I loved the design, and it was very straightforward, even if some parts were a little bit fiddly. It took my four hours, and another hour to cut out the pieces. Note to self: ask for a cutting board for Christmas, because cutting without it SUCKS, especially really big pieces.
The second inspiration was this Valentino bag, which I pinned because I loved the lace detail. I even labeled it with, "I bet I could do that."
At first, I looked for a tutorial for a similar bag shape, but most tutorials are for more square/big bags. I found a couple listings on Etsy that were close, but I wanted to do this cheaply, so I opted not to buy one. When I stumbled across my pin from the first cinch bag I liked, I decided to just add the lace and use similar colors and see how it went. A quick evening stop at the fabric store with Micah later, I had all of my material for less than $20. Yay for the Joann's app and their coupons!
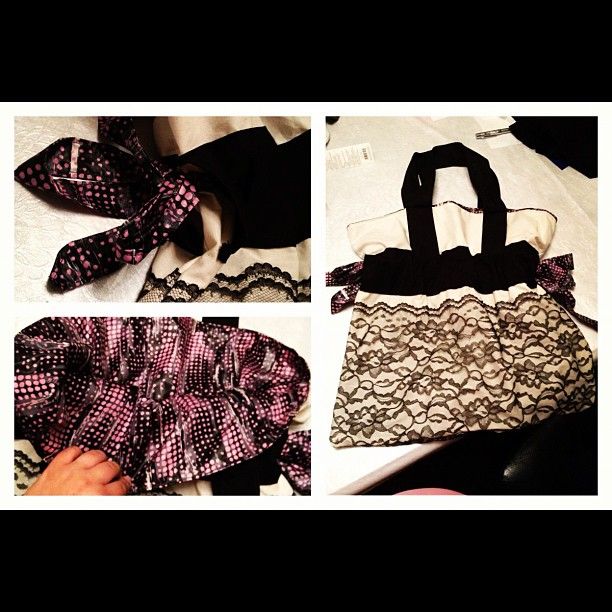
And this is my finished piece.

I absolutely LOVE this bag, and I have gotten so many compliments on it. Size is hard to judge in this picture, but it's really humongous, so much space for all my stuff. I actually think it's TOO big for every day use, but it's great on the weekend when I add all of Micah's stuff to it. The lining is a $6 piece of taffeta, which I have never sewn with before, and I am pretty sure I used the wrong type of needle for it. The popping noise and the huge holes left behind were an indication, hah. But it held up wonderfully and I double sewed a line in the bottom to make it as secure as possible. It's also slightly water-resistant, which I thought was great since I often carry a sippy cup and/or wet pants since Micah just finished potty training.
When I bought the lace, I had to buy an entire yard so I would have enough of that pretty edge for both sides. I used a zig-zag stitch - for the first time, can you believe it? - to attach it right at the curved edge, and it was virtually invisible unless you get it right next to your face. I was really proud of it. The whole bag turned out excellent, except for the top stitching on the top edge after I turned it right side out. I didn't think ahead enough and I didn't let the right amount of space to sew without the straps getting in the way. So definitely no close ups of this bag, haha! But for the casual view it really looks good. I've gotten a ton of compliments. I cannot recommend that tutorial enough!
<a target="_blank" href="http://1epicmom.com"><img alt="Weekend Blog Hop" src="http://i1099.photobucket.com/albums/g385/EpicMom/Bloghoptillyoudrop-1.jpg" /></a>


0 comments:
Post a Comment